Forming the boiler

Smokebox – boiler formers
Whilst cleaning up the multitude of castings for the springs, hangers etc. for the chassis, I thought I’d make a little progress on the bodywork so I’d get the feeling of getting somewhere. The bodywork initially is making up a few sub assemblies, the first one being the boiler and smokebox.
The first bit being a former to join the smokebox and boiler sheets together. The flat strip is folded into a square and then sandwiched between the two circular formers.

Smokebox and boiler etchings
The boiler is a supplied as flat etchings with a couple of formers and the smokebox is a plain inner etching with a half etched wrapper to go around it with the rivet detailing, so they will need rolling. This photo shows the components with the former between the boiler and smokebox made up.

Rolling the smokebox
This shows the rolling of the smokebox. The rolling bars can leave a small flat on one end so it is swopped around a couple of times to try an minimise this. When rolling the half etched sheet I use either a sheet of plastikard or card to protect the rivet detail. The boiler is tapered but rather than being true concentric the bottom seam should be parallel with the smokebox, ie all one straight line. This means that there should be a right angle between the bottom seam of the boiler and the throatplate. So when I start rolling the boiler the bottom edge is square to the bars, and slowly wind in the rear bar until the seam lines up. At the smaller diameter end of the boiler the rear bar is wound in slightly more each time than the other side.

Boiler ready for soldering
Once rolled up the formers are inserted inside the boiler and I used some jewellery wire to hold it all together. This is a soft iron wire which can be easily twisted by hand, although the final tightning is done with pliers but take care not to over tighten.

Clack valve pockets
Before it’s soldered up the instructions mention fitting the clack pockets. These are small brass castings to be sweated to the inside of the boiler. Note these castings are handed, there is a slight taper on the castings to match the taper on the boiler so take care to get them on the correct side.

Holding the pockets for soldering
This was one of those awkward jobs that need a couple of pairs of hands. Trying to hold the boiler, casting and soldering iron was entertaining especially as the casting was inside the boiler. In the end I tapped the hole in the clack pocket 6BA so that I could fit a cheesehead bolt allowing me to hold it externally with a pair of tweezers, allowing me to get the soldering iron onto the casting inside rather then the boiler wrapper.

Boiler and smokebox
Hopefully the photo shows it better than my explanation.

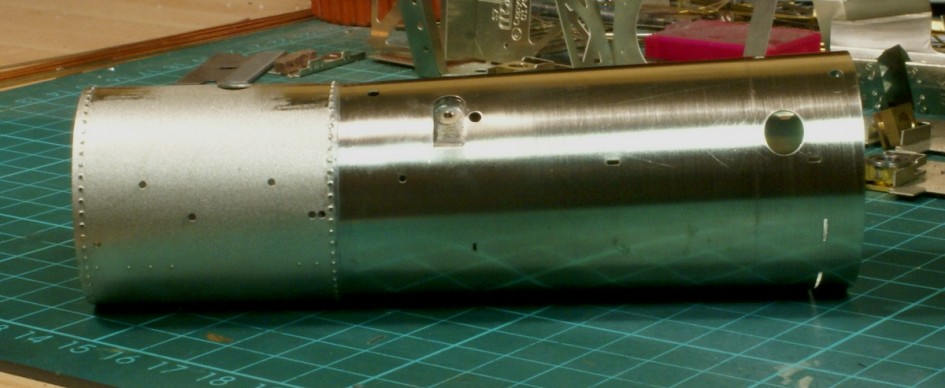
Boiler and smokebox
Once fitted the boiler was soldered up and the inner smokebox wrapper attached. A steel rule was used to ensure the bottom edge was aligned.
Finally the outer wrapper for the smokebox was fitted and cleaned up.
That’s it for the the moment. It can be put to one side as the next bit of the bodywork is the front footplate.


Leave a Reply