Category
Locos

We all seem to have our own little pet peeves in model making, one of mine is valve gear. Many years ago I was lucky enough to examine a couple of O’Gauge live steam loco’s built by the “Parkers” a… Continue Reading →

With the rolling chassis complete attention was turned to making up the tender body. The main tender body is a resin casting, the original casting supplied in the kit was the wrong one, a small 2500 gallon tender. This was despite the… Continue Reading →

This series of posts is intended to document the build of a Midland 3F loco and tender as supplied by JLTRT. It is another loco that was photographed around Tewkesbury so was is one to add my fleet of locos. The… Continue Reading →
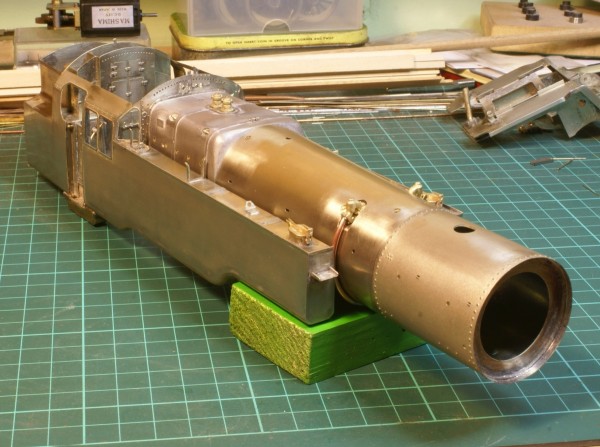
The detailing on the boiler required some some 1/16th copper wire, I added the regulator valve, clack valves and pipework, washout plugs etc. The supplied castings are superb and very clean with very little if any fettling required before fitting. This… Continue Reading →
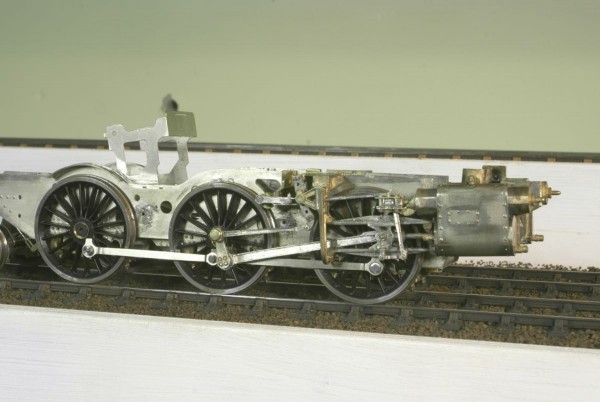
The next task in the instructions moved onto the coupling rods. Take care here as this is another situation where you need to have a good photograph of the loco that you want to model. The early build locos had fluted… Continue Reading →

Another component to require a bit of detailing before all the bodywork is all assembled is the firebox. The instructions recommend drilling all the holes for the washout plugs, mud hole cover clamps, safety valves and top steam manifold. All lots… Continue Reading →

Skinning the tanks The side skins for the tanks are half etched for the majority of the side so that the beading around the windows and along the top of the tanks is prominent. However this does mean that they… Continue Reading →

So continuing with the valve gear for the 4MT, the next job in the instructions was connecting the rotating arm with the expansion link. Now the instructions say to use nickel silver rod as pins and solder in place. However I like… Continue Reading →
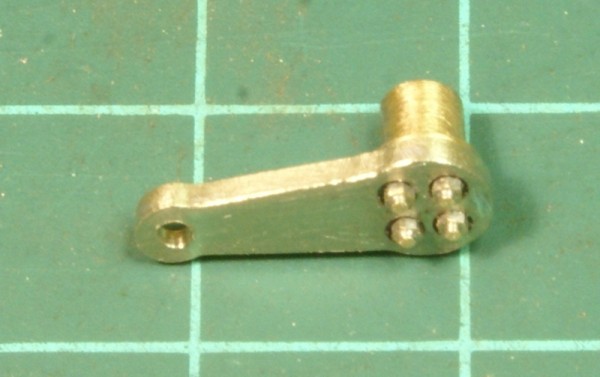
Building the valve gear. In the instructions the motion building starts with the expansion link and radius arm so these are the bits supplied. They are all brass castings, two halves for the expansion link and cast radius arm. The… Continue Reading →

Now we can get on with building the main tanks for the loco, which starts with the front spectacle plate for the cab. This has another half etched overlay which provides the rivet detail around the top visible part of… Continue Reading →

Building the rear bunker. Next in the instructions we move to the rear of the loco to start building up the bunker. We start with making up the rear of the cab with the fitting of the coal doors. The… Continue Reading →

Building the front footplate The next sub-assembly to build is the front footplate unit. We begin with finding all the etched parts for the platework, these form the saddle and the front dummy frames visible above the footplate. The component… Continue Reading →
Recent Comments